So, you’ve got WordPress and have WooCommerce installed. The next step is populating your site with products! This blog will take you through how to get underway, point by point, starting with adding a simple product, building in complexity, and closing with such possibilities as grouped products and tweaking backorders.
Let’s get underway. To add that simple product, go to WooCommerce, Products, Add Product. It’ll look just like a new blog post, if you are familiar with these, in WordPress. Add a Title and Description. On the Product Data panel, select downloadable (for digital products) or virtual (for services), if needed.
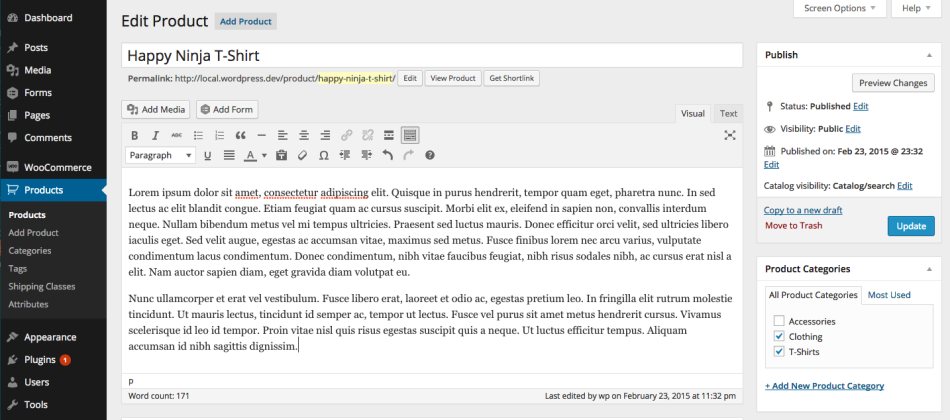
Staying in the Product Data panel, we’ll work down the left-hand panel from General to Inventory to Shipping to Linked Products, then Attributes and Advanced.
Looking at the General section:
- SKU – standing for Stock Keeping Unit, SKUs track products. They must be unique and not match any posts IDs, which are numbers alone.
- Price – divided into Regular Price and Sale Price, users can set an item’s normal, day-to-day price and what it can be discounted to over a specific date range.
The inventory section lets you manage stock on an individual level. Back orders can be allowed, stock quantity set and stock status specified.
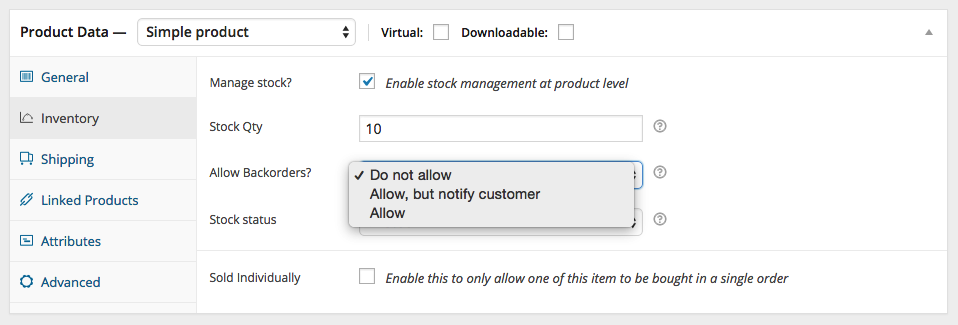
If the Sold Individually checkbox is ticked, no more than a single item of a product will be sold per order.
In the shipping section, we have the option to adjust an item’s:
- Weight
- Dimensions – length, width and height.
- Shipping class – used to group similar products for particular shipping methods.
Linked Products section
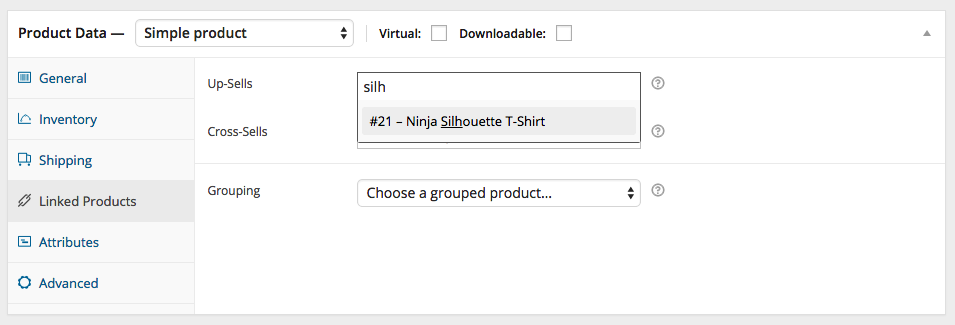
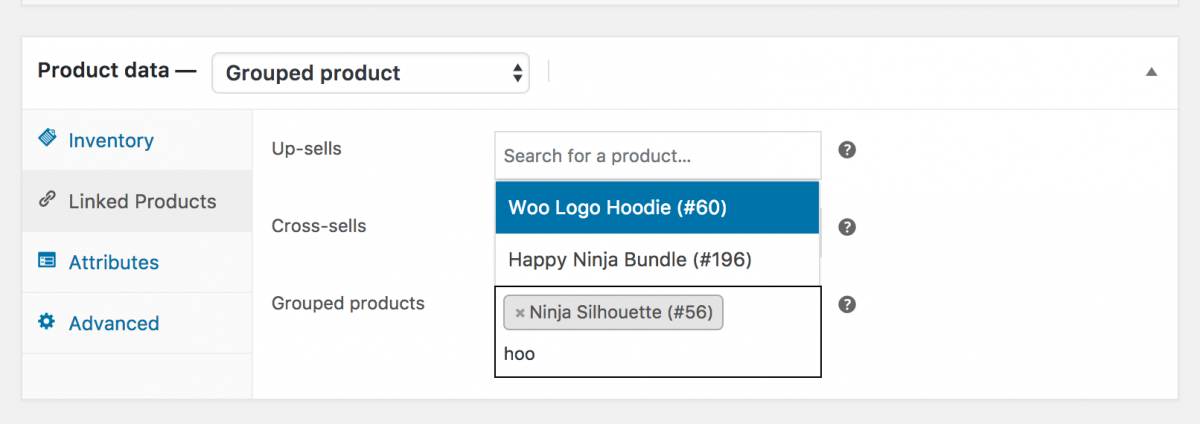
With up and cross sells, it’s possible to promote products. They’re added by searching for a product and selecting it from the dropdown list:
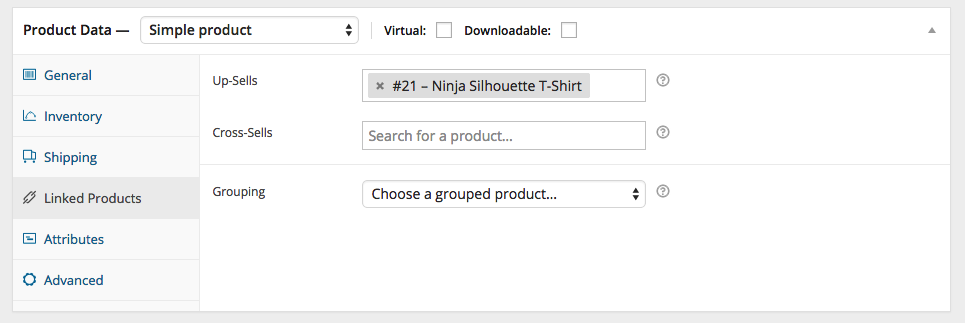
And once you’ve added them, they’re listed in the input field:
Up-sells appear on the product details page. Up-sells contain products that motivate users to upgrade, depending on what product they’re looking at. An example would be a slow cooker to accompany a kitchen knife set.
On the other hand, cross-sells are products shown with carts and are related to its contents. An example would be a keyboard for a computer.
Grouping enables products to be sold as part of a larger whole. We’ll return to this in greater depth later on.
Attributes section
The Attributes tab allows details to be assigned to a product. It contains a select box showing global attribute sets you’ve created.
Once you’ve chosen an attribute, click to add and apply the terms associated with it to the product. Attributes can be hidden by leaving the Visible checkbox unticked.
Your own attributes can be applied by selecting Custom product attribute. They’re added at the product level and aren’t available in layered navigation.
Advanced section
- Purchase note – an optional note to be sent to customers after they’ve purchased a product.
- Menu order – sets custom ordering position.
- Enable reviews – to allow customer reviews.
Product short description
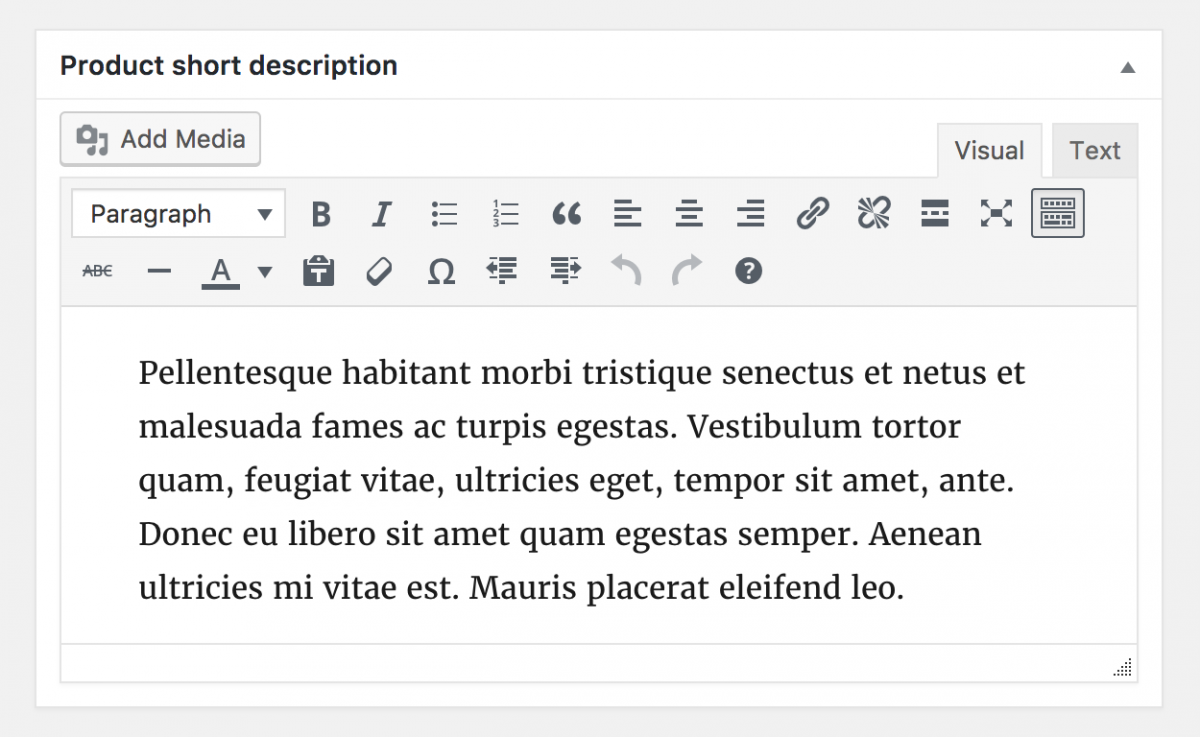
Here you can describe a product. It appears next to product images, whereas long descriptions fall under Product Description tab.
From version 3.1x onwards, videos can be embedded.
Taxonomies
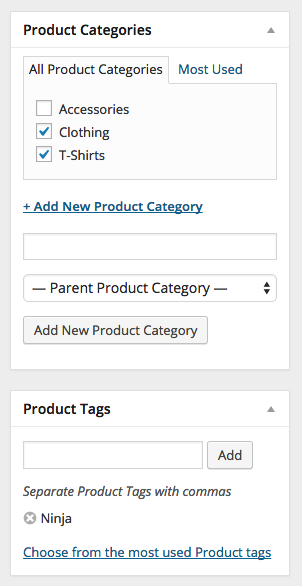
Right of the Add New Product panel, you’ll find categories you can assign your product, just like a normal WordPress post. Product tags operate in much the same fashion.
Product images
Here you have the choice of setting a main image or establishing an image gallery.
Setting catalogue visibility and feature status
Looking at the Publish panel, catalogue visibility can be chosen.
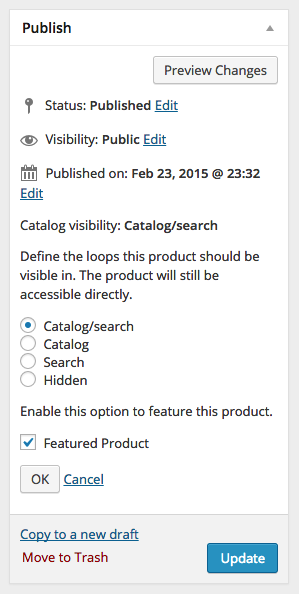
- Catalogue and search – means product visibility everywhere, from shop to category pages and search results.
- Catalogue – all the above, but not search results.
- Search – visibility in search results, but not the shop or category pages.
- Hidden – visibility only on the single product page.
Adding a grouped product
The process for creating these is similar to that for Simple products, the only difference being the selection of Grouped from the Product Type drop-down.
Create the Grouped product
This is broken down into several parts.
First, head to WooCommerce, then Products and Add New.
Second, type in the Grouped product’s Title.
Third, scroll to Product Data and choose Grouped from the drop-down. Don’t be surprised when price and other fields vanish – this is because a Grouped Product is a composite of ‘child products’.
Fourth, publish!
You’ll notice that the Grouped product is still empty. To populate it, you’ll need create products and add them, and include existing child products.
Add products to the Group
- Navigate to WooCommerce, Products, Add New.
- Hit the Grouped product to which you want to add products.
- Scroll to Product Data, finding Linked Products.
- Choose Grouped Products, finding the product by typing.
- Click the products you want to add.
- Dragging and dropping re-orders the Grouped Products. They’re shown on the product page when you hit Update.
Adding a virtual product
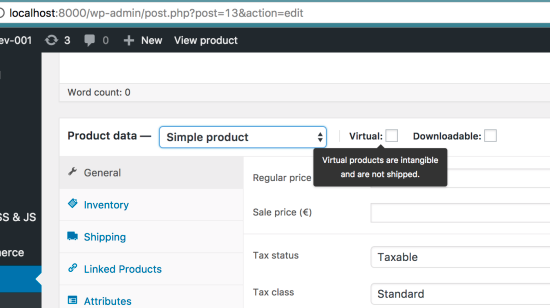
This is as easy as ticking the Virtual checkbox for Simple products.
But with Variable products, the checkbox is shunted to each variation.
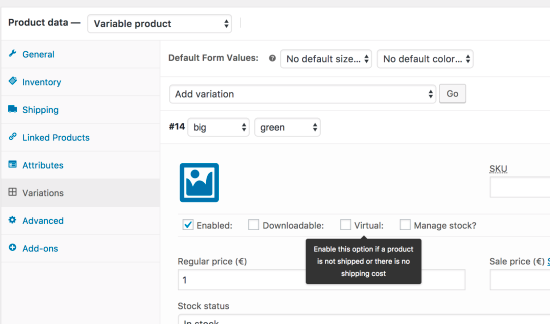
If allowed, all shipping-related fields, like shipping dimensions, will be disabled. Nor do virtual products trigger the shipping calculator in checkout and cart.
Adding a downloadable product
Hitting the Downloadable checkbox in the product type panel for Simple products adds two new fields for the:
- File path to your downloadable file.
- Download limit – how many times a customer is allowed to download a file. Can be left blank for unlimited downloads.
Adding an external/affiliate product
Choose ‘External/Affiliate’ in the product type dropdown menu. That takes away unneeded tabs and introduces a new product URL field. That’s the destination where users buy the product. And rather than Add to Cart buttons, they see a Read More button sending them to this URL.
Adding a variable product
These are the most complex product types. They permit definition of variations of a single product where each has a different SKU, price or stock level.
Duplicating a product

Duplicating products is straightforward – just head to WooCommerce, Products, find the product(s) you want to replicate and hit Duplicate.
Deleting a product

Regarding product deletion, head on over to WooCommerce, Products, find the product you want to delete and hover under the Product name to click Trash.
Mark a product as Featured
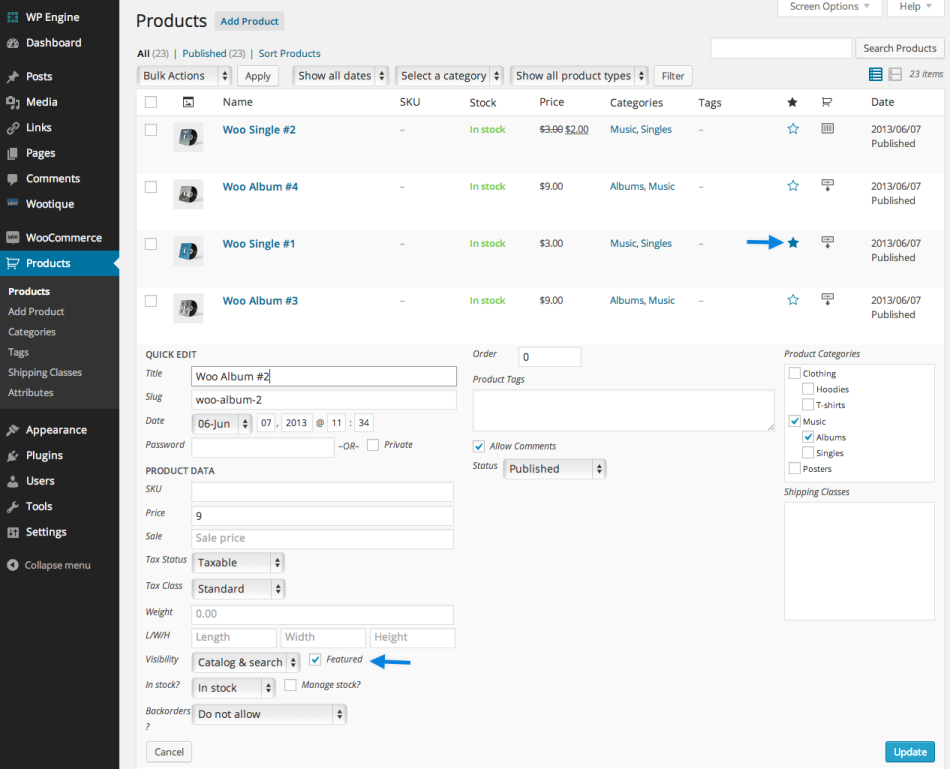
For marking a product as featured, go to Products and select the Star you’ll see in the featured column. Or just select Quick Edit and then the Featured option.
Manually sort products within a Category
Under Products:
- Locate your category to filter for in the Filter by category.
- Hit Filter.
- And then hit Sorting for the manual sorting mode.
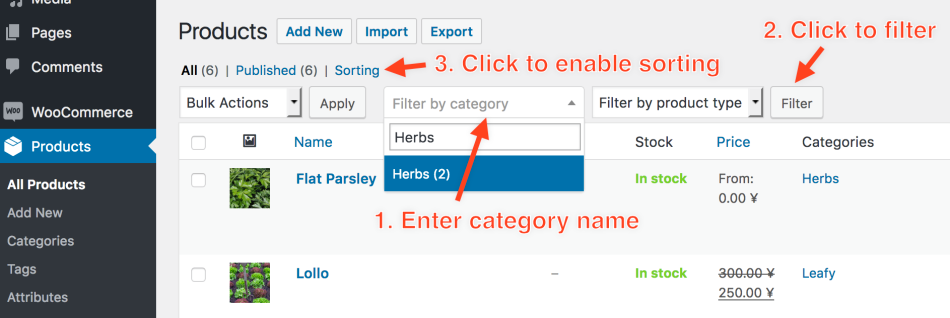
In Sorting mode, it’s possible to click on a product, then drag and drop to re-order it.
Product ID
You’ll sometimes need a WooCommerce Product ID for shortcodes, widgets and links.
To see the ID, go to Products and hover over the product you need the ID for.

Allow backorders
Whether to allow Backorders can be determined from the dropdown menu provided you are managing stock on a product.
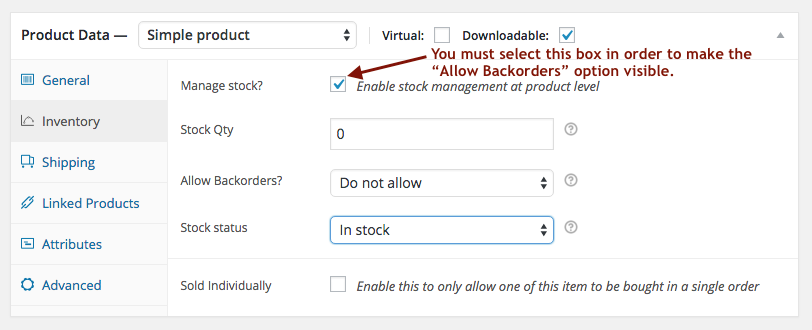
For backorders to be allowed, Stock status must be set to ‘In Stock’, even if the Quantity is 0 or less. WooCommerce Waitlist is a separate extension that charges customers only when the item is back in stock.


